Connect your docs repo
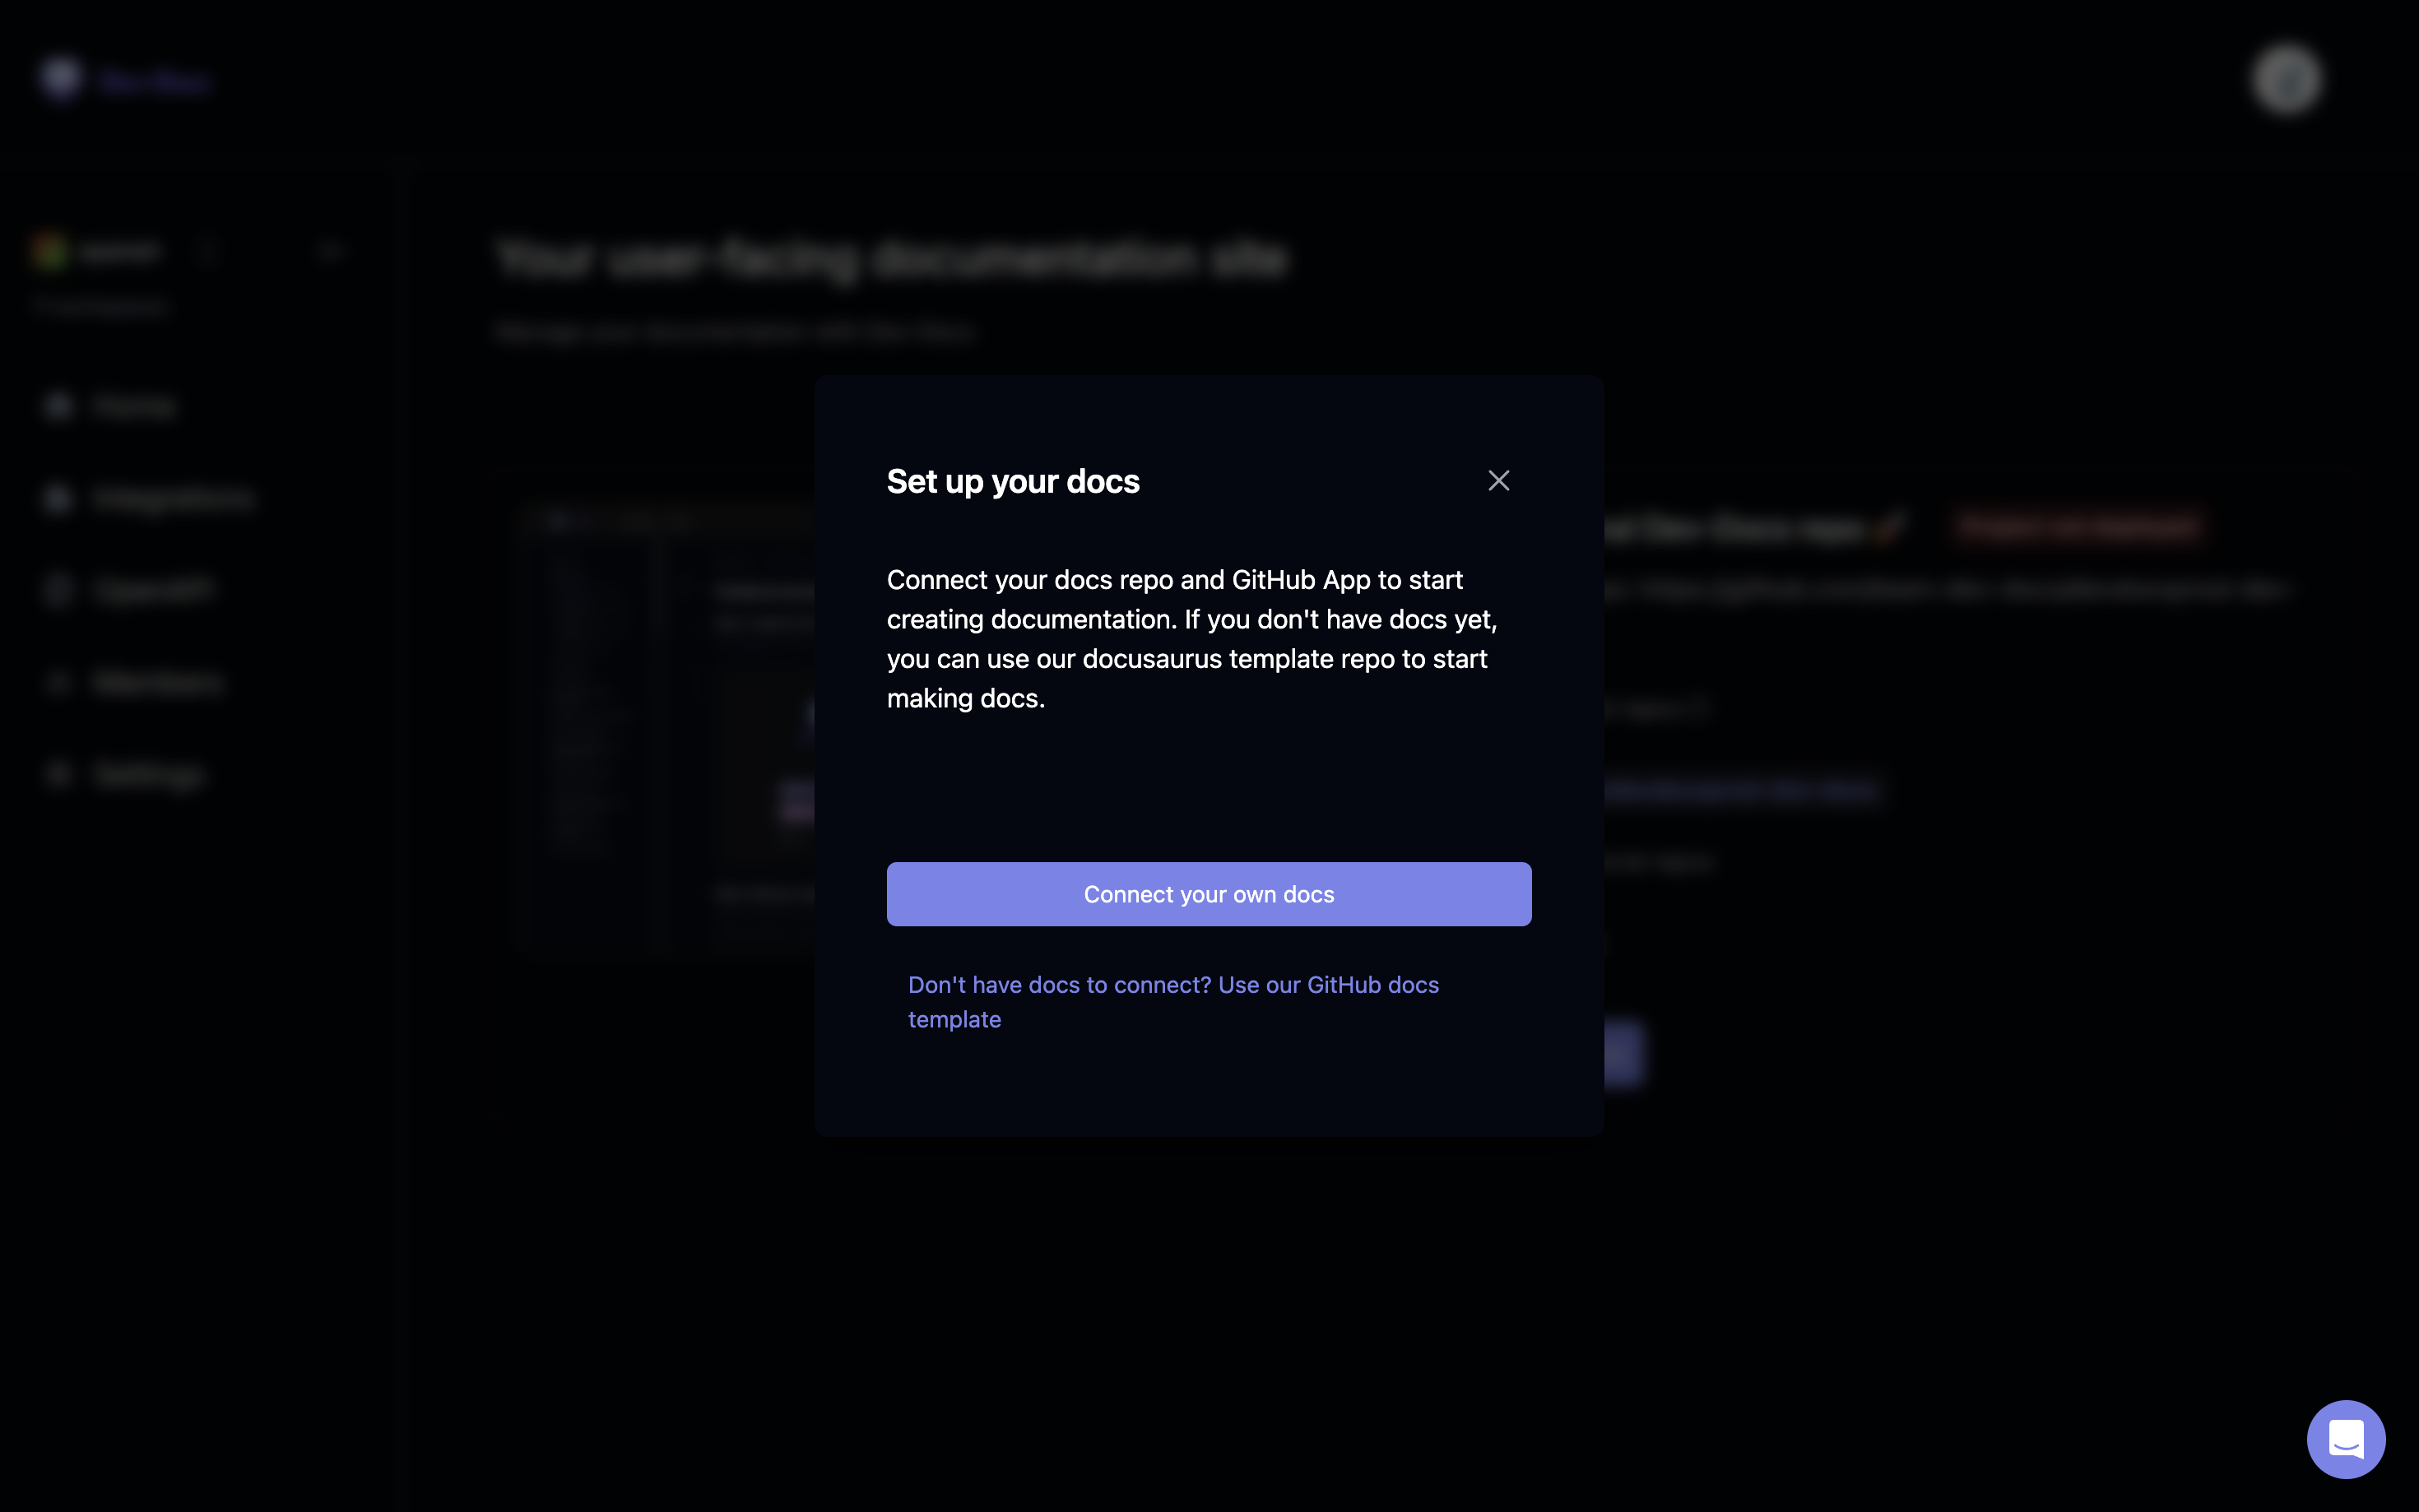
Step 1: Begin setup to connect your docs
When first setting up your Docs.dev account you will be prompted to set up your docs. Select Connect your own docs and click on Install the GitHub App to begin the integration process.
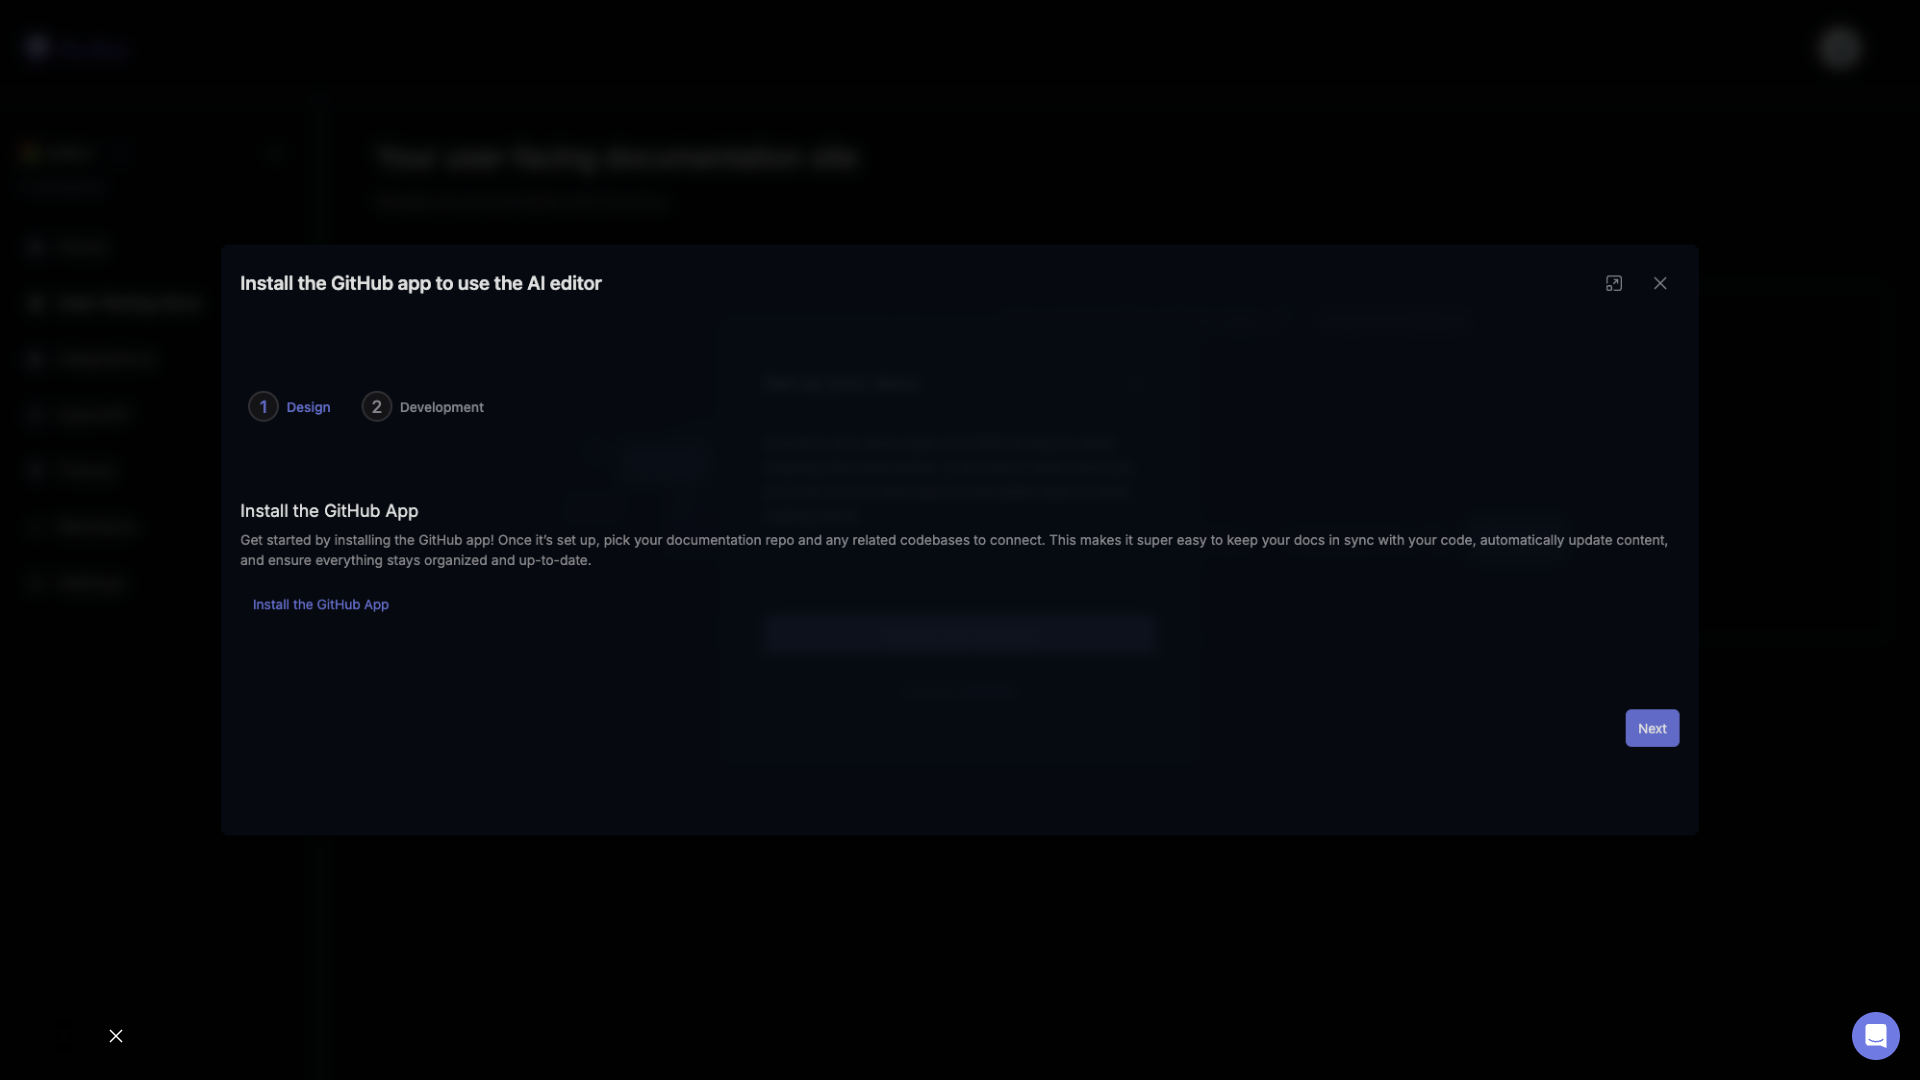
Step 2: Set up User-Facing Docs by installing the GitHub App
To use your existing docs, select Connect your own docs and click on Install the GitHub App to begin the integration process. Clicking this will take you out of Docs.dev and into your GitHub where you can install and set up the Dev-Docs GitHub App.
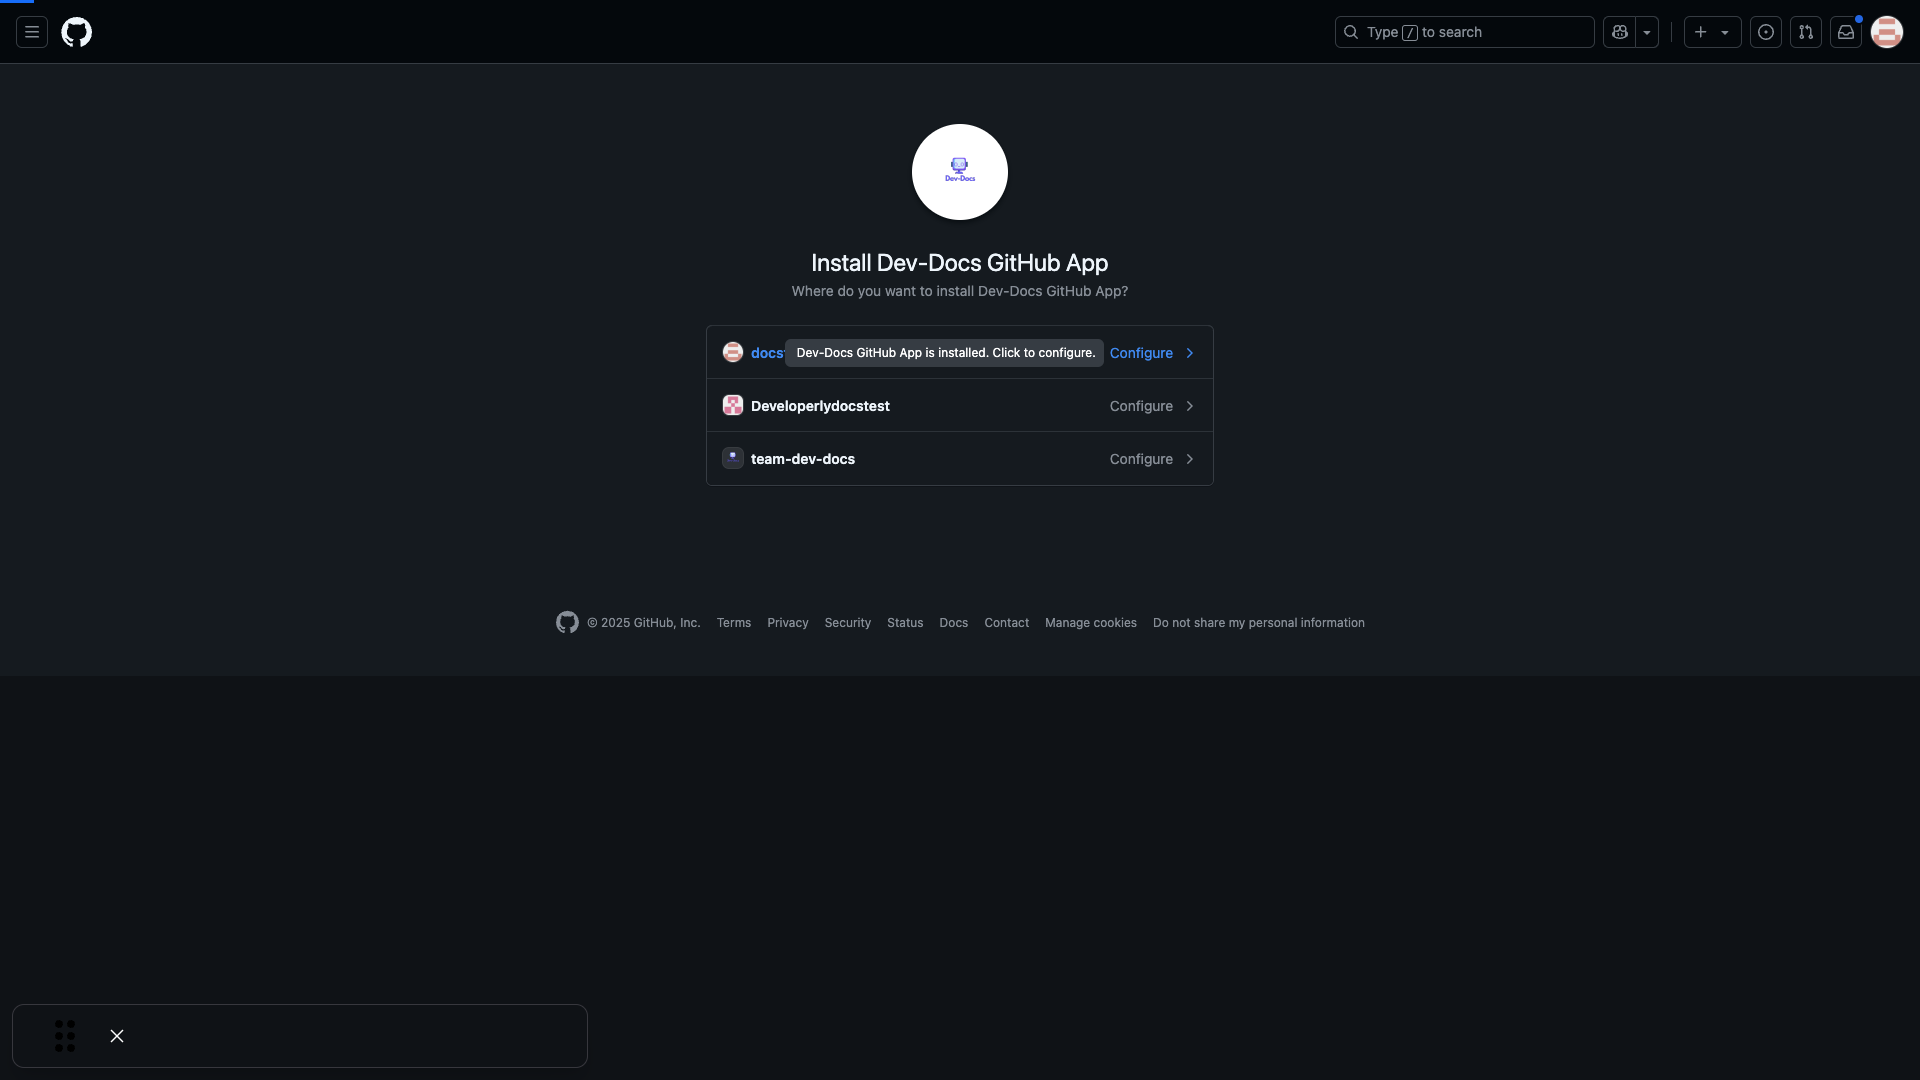
Step 3: Confirm repository selection in GitHub
Select Install or Configure if you have installed the app already.
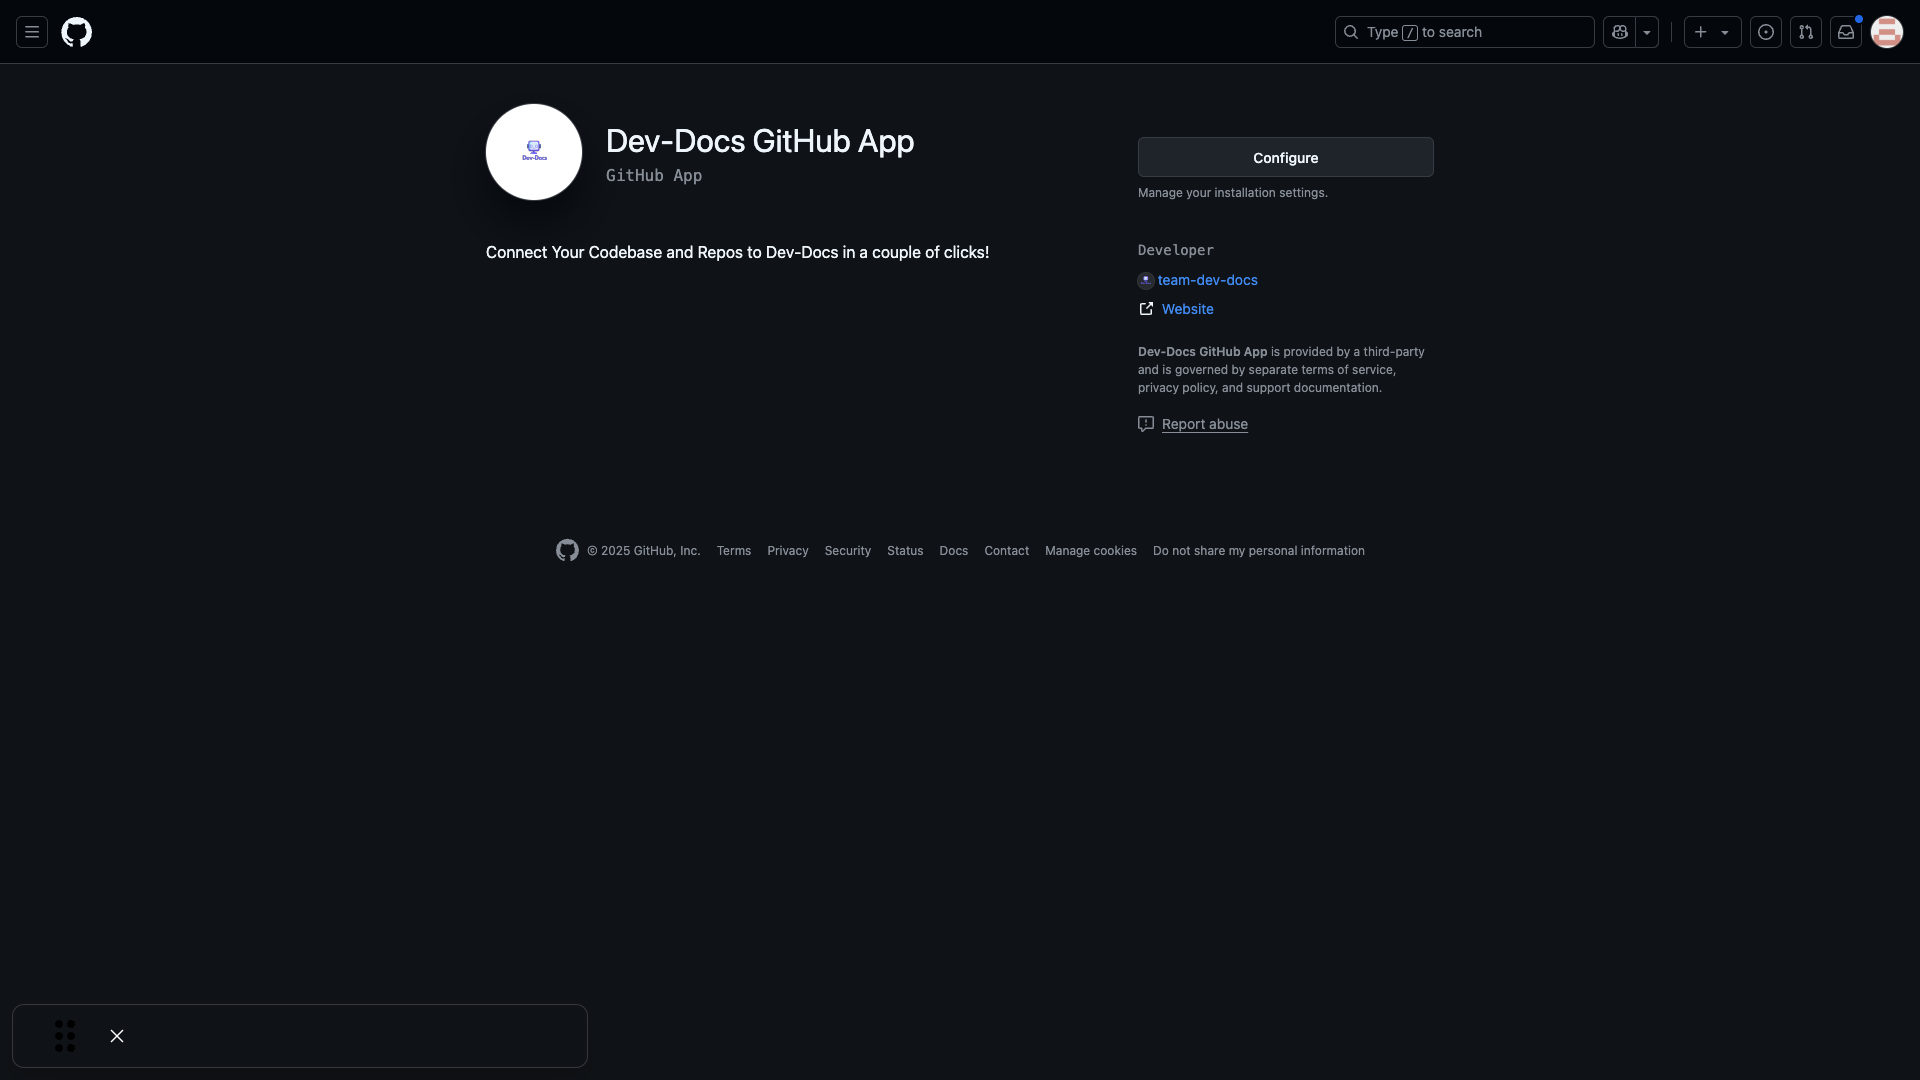
Step 4: Select your GitHub account or organization
Choose the GitHub account or organization where you want to install the app.
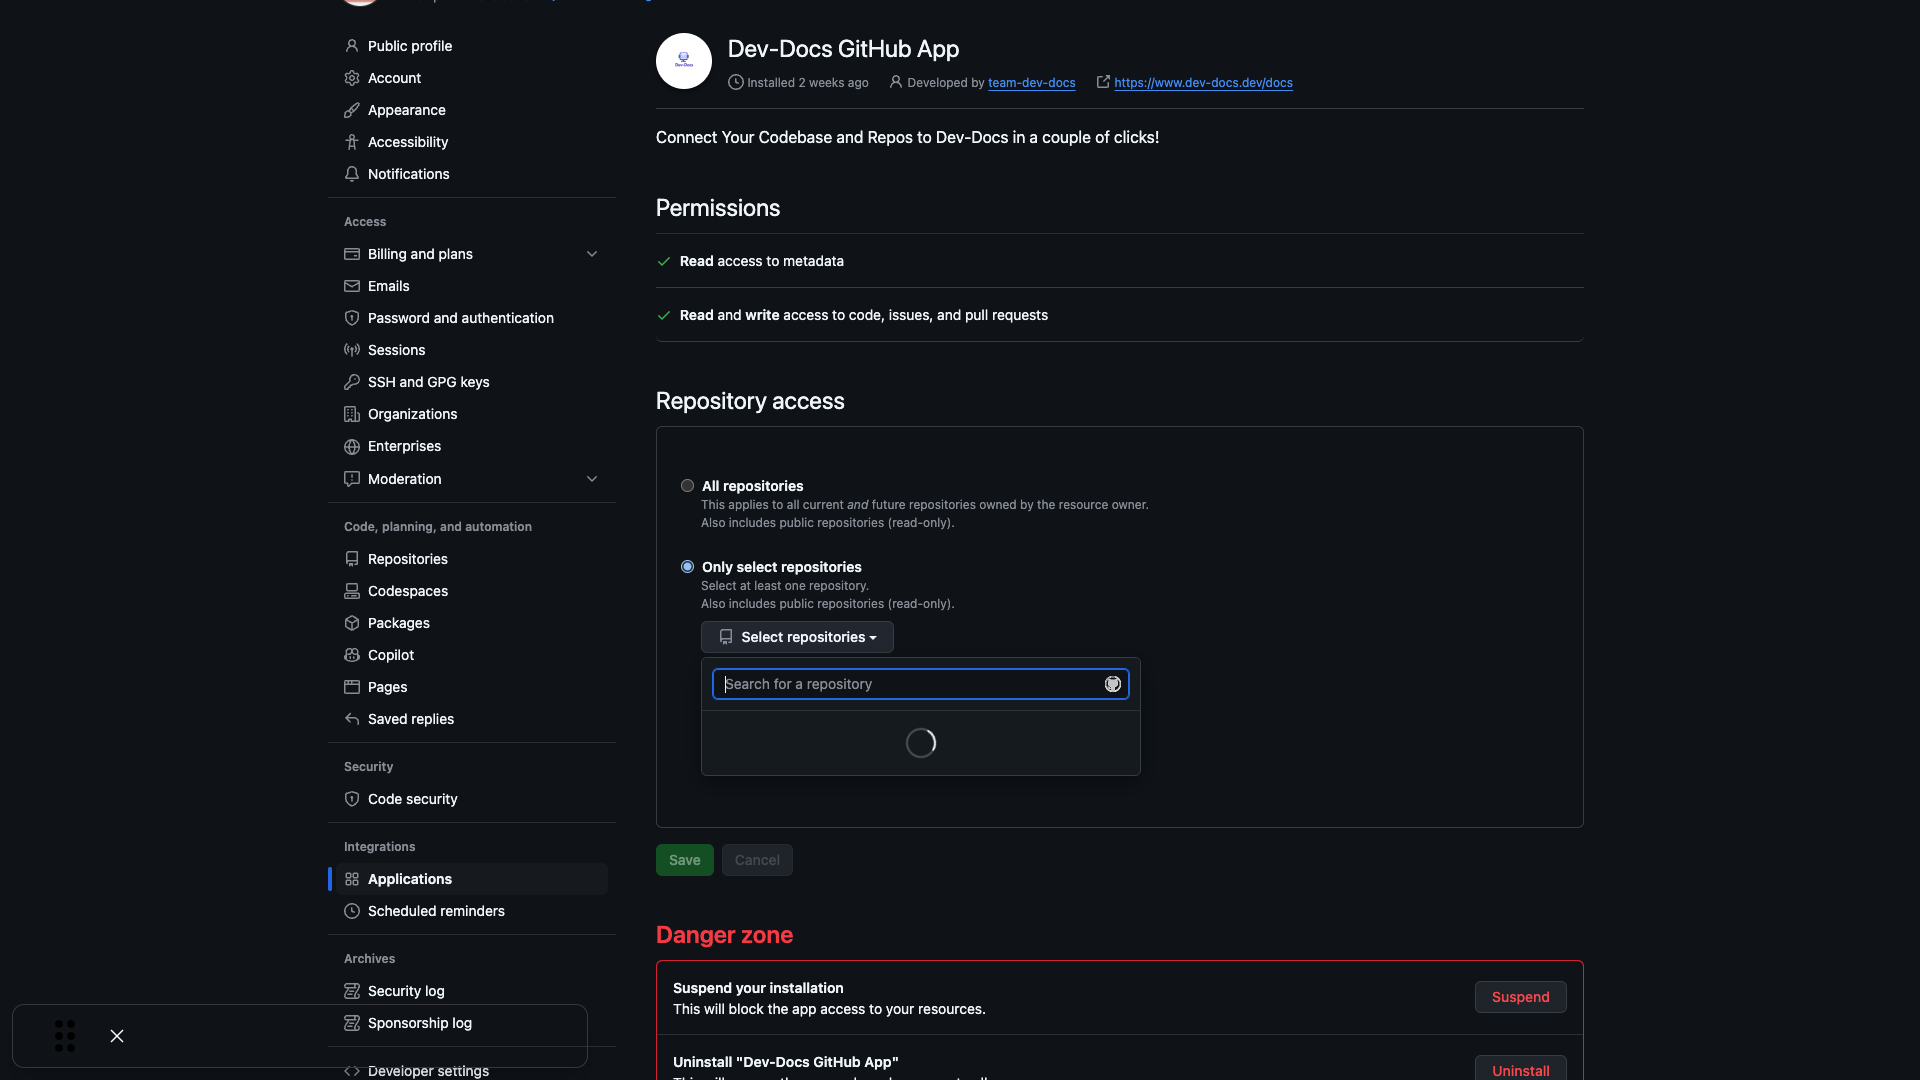
Step 5: Add and select your documentation repo
From the dropdown, find your docs repo. Feel free to connect any other public codebases you would like the app to have access to as context. Be sure to select it and select Save.
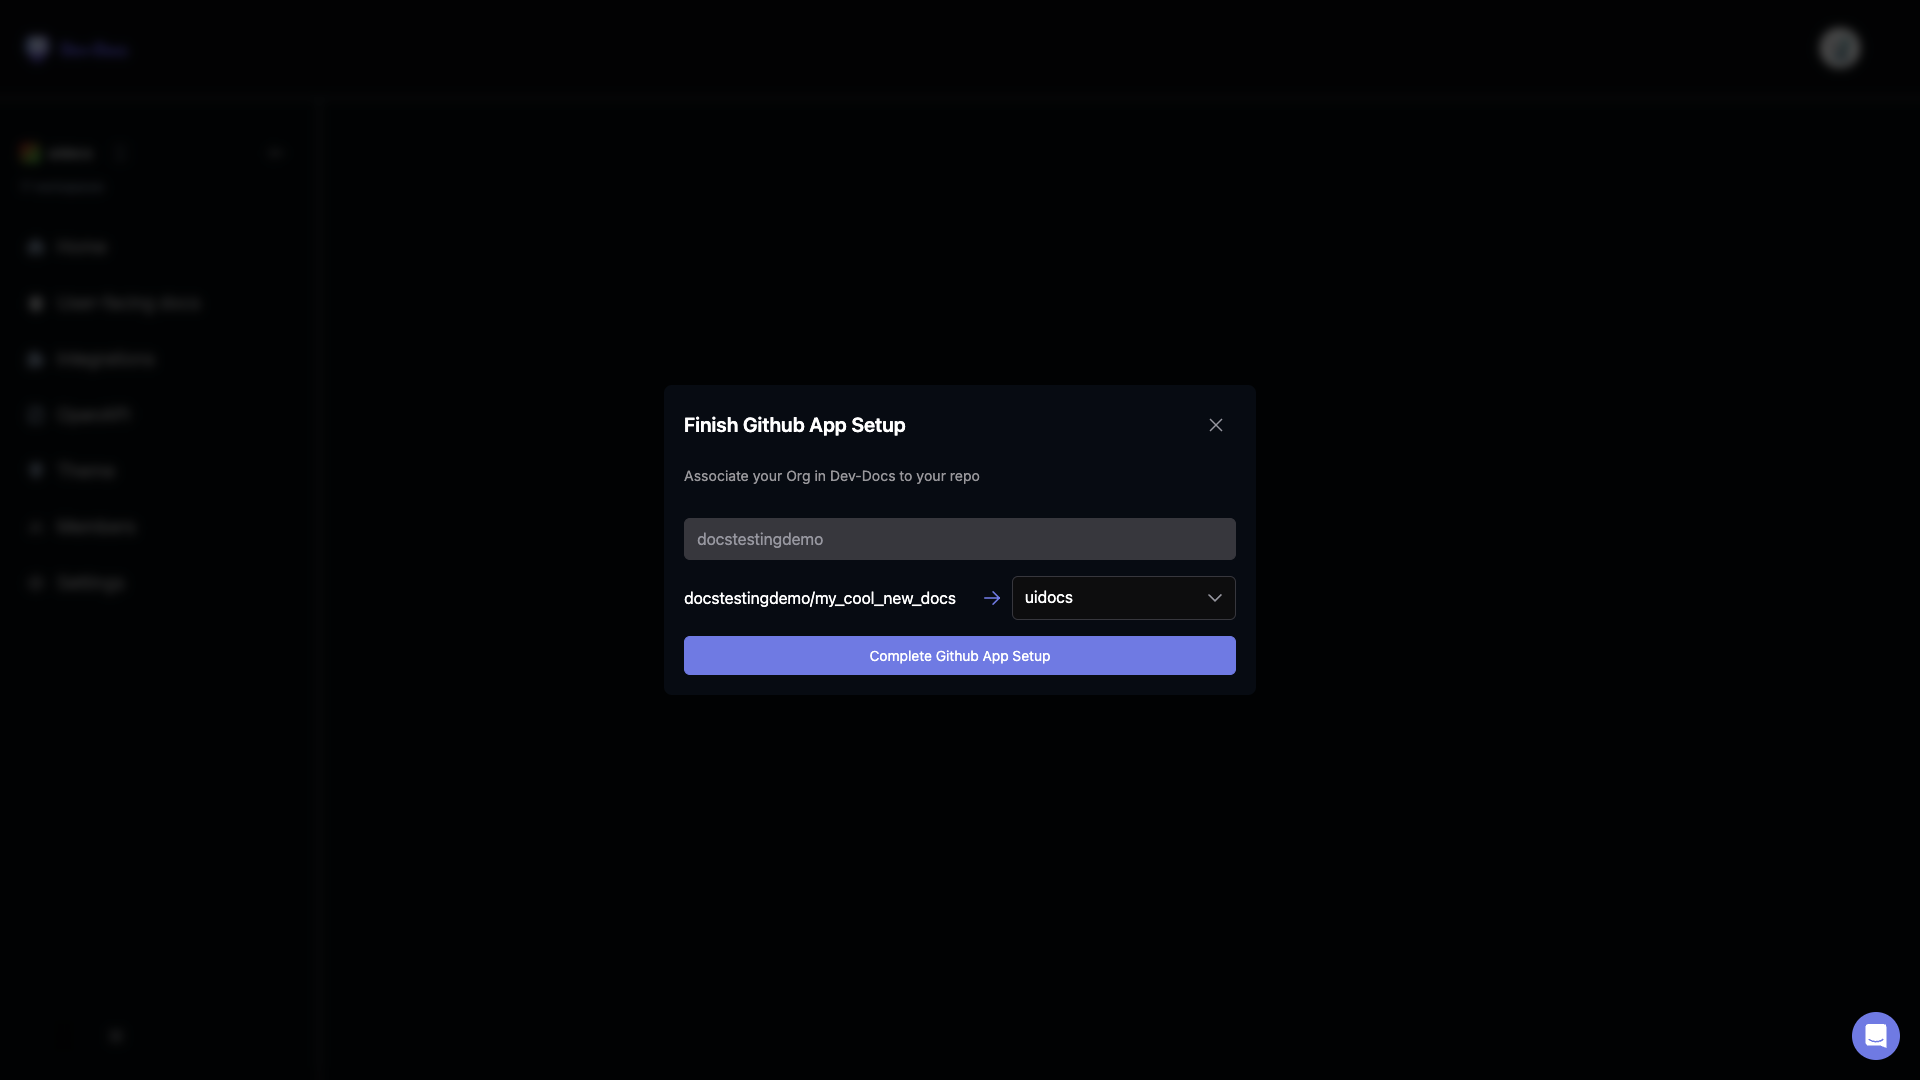
Step 6: Associate your repository with your Dev-Docs organization
Once done, go back to the Docs.dev web app and confirm that your repository name matches your desired Docs.dev organization and select Complete GitHub App Setup.
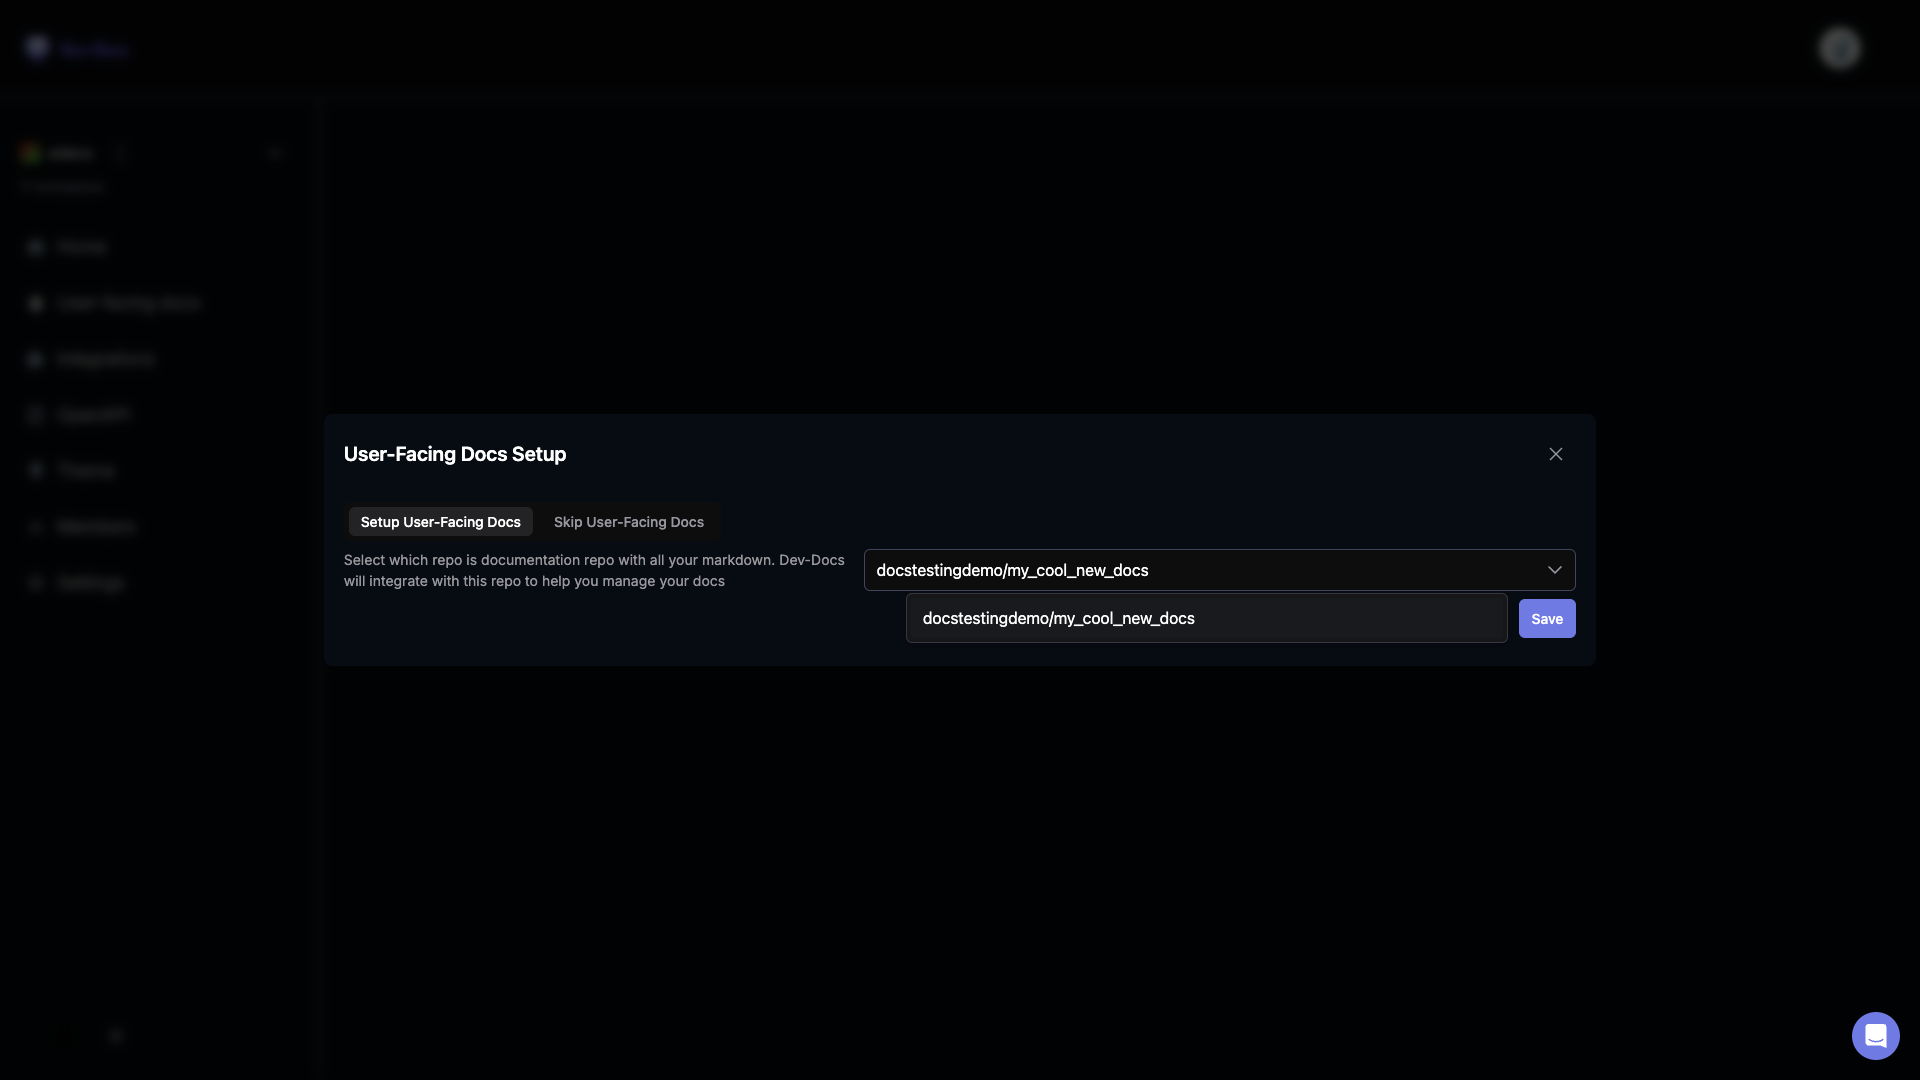
Step 7: Set your documentation repo in Dev-Docs
You should now see a dialog prompting you to select your documentation repository. Choose the one we set up from the dropdown. This step informs Docs.dev where your documentation lives and where the Docs.dev editor should pull from. Once this step is done you're all set and ready to go!